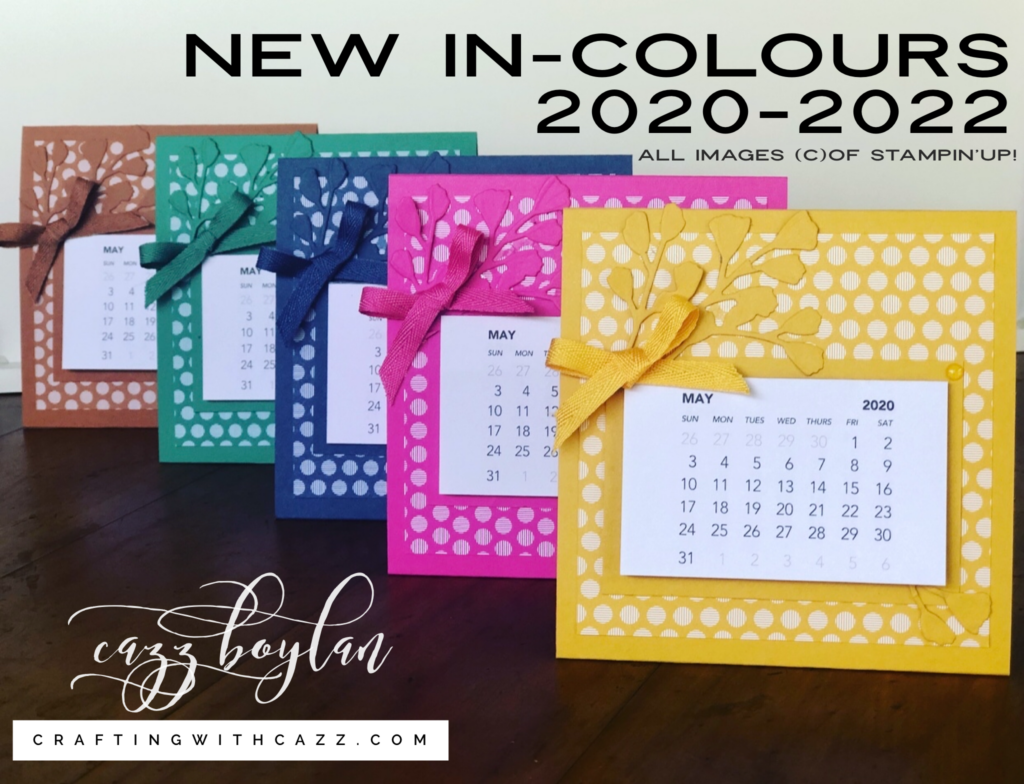
I have fallen in LOVE with the beautiful NEW Stampin’Up! In Colours 2020-2022!
From Left to right – Cinnamon Cider, Just Jade, my favourite so far Misty Moonlight, Magenta Madness and last but not least Bumblebee!
These stunning new InColours will be available June 3rd or to new demonstrators now! ! So mark your calendars!

As soon I received my Preorder, I wanted to create something that showcased all the beautiful INCOLOURS!
( PRE – ORDER = is an amazing perk of joining Stampin’Up! One of the key reasons for me signing up, as who wouldn’t want new products a month earlier then everyone else at a discounted price! I would love to answer any questions you may have of joining my team so you too can get your hands on these beautiful products early! )
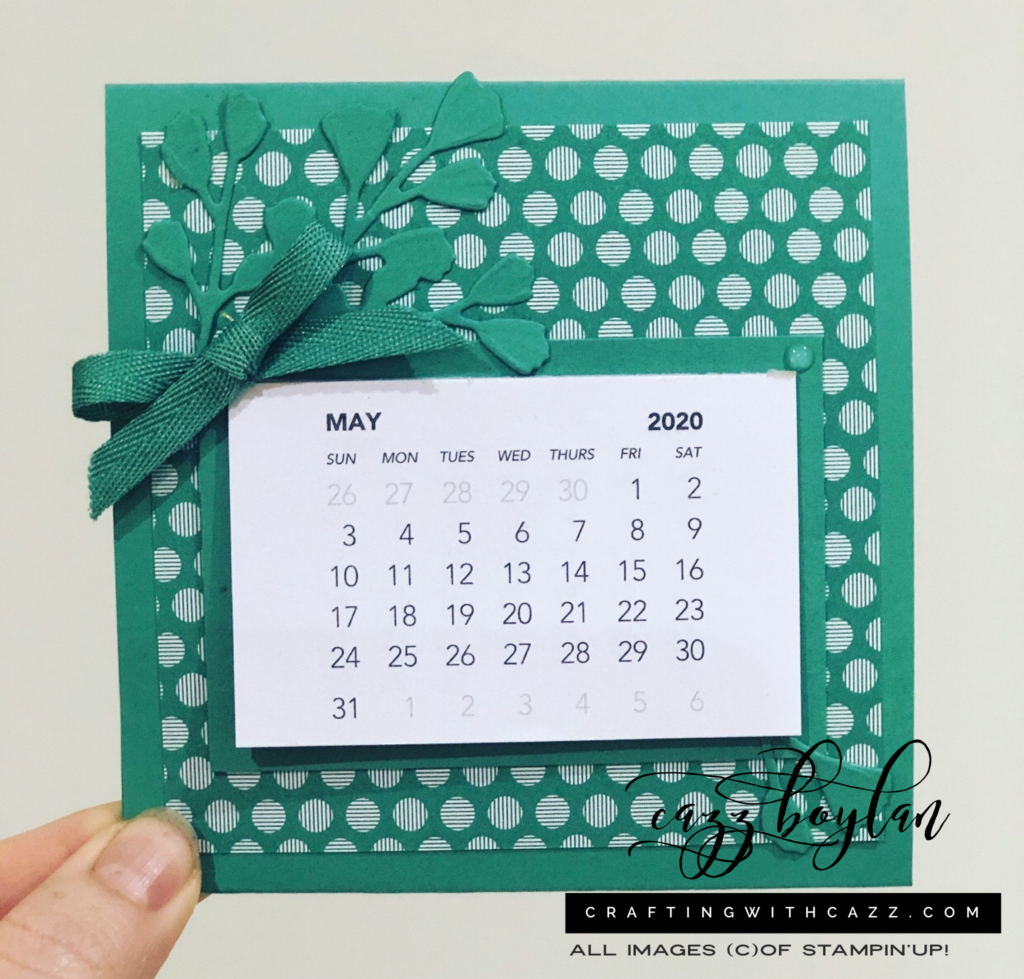
I chose to create these gorgeous little desk top easel calendars to showcase all of the beautiful new colours!

I have teamed up the beautiful new In Colour Cardstock, matching Designer Series Paper and coordinating Ribbons with the beautiful Forever Flourishing Die to create these little Easel Cards! Aren’t they cute?
Here is a quick and easy video showing you how! Please Note It has been a long time in between creating videos so Ive accidentally cut some of the products used in the clip. However all products are listed below for you!!
To create these Easel Cards you will need –
In Colour Cardstock measuring 10.5cm x 29.6cm OR 11 5/8″ x 4 1/8″ ( for A4 users just cut in half so you can create two)
In Colour Designer Series Paper measuring 9.5cm x 9.5cm OR 3 3/4″ x 3 3/4″.
In Colour ribbon – 25.5cm OR 10″
One mini calendar – Available online Or you may choose to add a half pack of Sticky Notes to the front.
One piece of coordinating cardstock to back the calendar or sticky notes.
INSTRUCTIONS
Using your Simply Scored Scoring Plate score on the long side at 1/2″, 1 7/8″, 3 1/4″ and 7 1/2″.
Fold and burnish using your Bone folder on each of your score lines. You will fold in and out in an accordion fashion to create the easel.
Using Tear and Tape, adhere your Easel base together. Adhere your Designer Series Paper to the front of your easel with Tombow Multipurpose Glue.
Run your Forever Flourishing Dies through your Die cutting machine. Using your Simply Snips cut the bottom three fronds from the die cut piece.
Adhere your calendar to your scrap piece of Cardstock and adhere to your easel front using Tombow Glue. Before its dry slip the bottom of the Die under each corner of the calendar. Add a few Glue Dots to the die and adhere to the Easel.
Tie your In Colour bow and adhere to the front of your easel with Glue Dots!
How super easy is that! I love quick and easy project that still packs that wow factor!
If you have any questions about joining my team or getting your hands on this beautiful new catalogue please do not hesitate to contact me! Id love to help you out!
Happy Stamping,

Love Cazz xo
Would you like to join my beautiful team and get 20% discount off your future purchases then sign up here – Join My Team
Need some fabulous new Stampin’Up! products, shop my online store – SHOP NOW
The content of this Blog, website or other internet medium is the sole responsibility of Cazz Boylan as an Independent Stampin’Up!® Demonstrator and the use of and content of classes, services and products offered is not endorsed by Stampin’Up!®
Images (c) Stampin’up!®TM 1990-2020